KUDA Shaders Mod 1.14.4/1.12.2 is a shaderpack made for the Minecraft Shaders Mod. This shaderpack will change completely the whole look in Minecraft. KUDA Shaders adds basically shadows, new lightning system, godrays and other effects.
This pack is among the Top 3 concerning popularity. Unlike other realistic pack, this one is much faster and customizable, which speaks for itself. The effects are not overwhelming, but nice and decent.
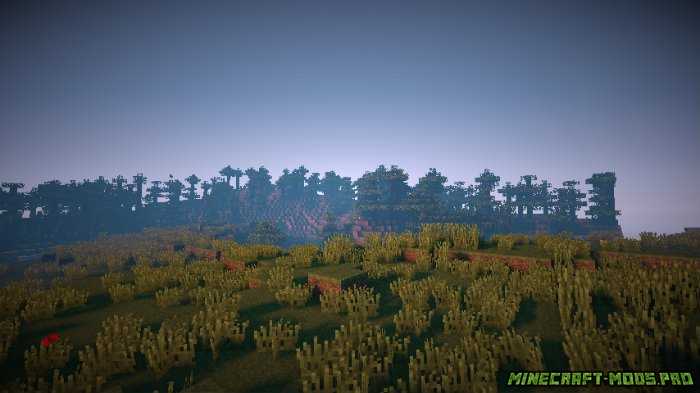
The sun shines nice and calm over the landscape and reflects at the water surface. Wonderful clouds are flying on the sky and disappear in the air.
Water effects are designed very detailed, making it even more realistic. Incredible Shadows are dropped into the water surface by the light effects.
Screenshots:


Requires:
How to install:
- Make sure you have already installed Minecraft Forge , Optifine HD and .
- Locate the minecraft application folder.
- On windows open Run from the start menu, type %appdata% and click Run.
- On mac open finder, hold down ALT and click Go then Library in the top menu bar. Open the folder Application Support and look for Minecraft.
- Place the mod you have just downloaded (.zip file) into the .minecraft/shaderpacks/ folder.
- When you launch Minecraft and click the mods button you should now see the mod is installed.
KUDA Shaders Mod 1.14.4/1.12.2 Download Links:
For All Minecraft Versions:
KUDA Shaders Lite
KUDA Shaders Default
KUDA Shaders Ultra
KUDA Shaders Ultra Blur
Большинство шейдеров пакеты, которые вы найдете либо настолько продвинуты, они требуют на машины для игры Minecraft, или они настолько базовые, что они действительно не сделать многое, чтобы изменить внешний вид игрового мира. Время от времени вы видите что-то вроде куда шейдеров мод, который специально предназначен для работы с увеличенным установки на новых компьютерах, но по-прежнему работает на старых, медленных компьютерах одновременно. Потому что вы можете настроить уровни эффекта и изменения объема штамм на ваш компьютер, этот шейдер пакет действительно выделяется из всех остальных существующих шейдеров.


Если вы используете много разных шейдеров пакеты, вы, возможно, видели одного, который куда шейдеры мод черпали вдохновение из; Chocapic13 по В4. Есть некоторое сходство между этой пакет и тот пакет, как путь света и тени, кажется, смешиваются в сучьях деревьев, но этот шейдер пакет свою работу в большинстве случаев. Последние обновления добавили эффекты затенения для водоемов, но не похоже, что конкретно этот мод по-прежнему поддерживается Творцом. Это плохие новости и хорошие новости, и вот почему.


Это плохо, потому что там (наверное) не будет больше обновлений в будущем. Это означает, что у вас сейчас, что вы можете ждать вечно. Но это тоже хорошо, потому что если ваш компьютер сможет запустить Майнкрафт с текущей версией куда мод Шейдерами, тогда вам никогда не придется беспокоиться ни о чем обновление, чтобы сделать его работу в будущем. В целом, это просто как другой шейдер паки, если не немного проще. Он также показывает, что встроенной функции для изменения параметров и повышения или понижения эффектов, поэтому он работает на широком спектре машин, где другие шейдеры не будет.
Владельцы мощных компьютеров могут значительно улучшить внешний вид Minecraft. Например, можно установить шейдер KUDA Shaders , который делает графику более реалистичной и захватывающей.
Эти шейдеры очень сильно изменяют свет, воду и отражения в Майнкрафте, делая их максимально похожими на настоящие. Конечно, это сильно уменьшит количество FPS, поэтому они подойдут далеко не всем. Существует три версии шейдеров: Lite, Standard и Ultra. Ты можешь скачать их все и подобрать оптимальный для своего ПК.
Инструкция по установке шейдера KUDA Shaders
- Убедись, что у тебя установлен и корректно работает .
- Скачай ресурспак и оставь его в заархивированном виде.
- Запусти Minecraft, перейди в настройки графики.
- В разделе «Шейдеры» выбери «Папка с шейдерами».
- Откроется папка shaderpacks, в которую тебе нужно скопировать шейдер.
- После копирования шейдер появится в списке. Кликни по нему, чтобы выбрать.
- Запускай новую игру или загружай старую. Шейдер будет работать во всех сохранениях.
For Minecraft come in all forms. Some will give you a huge boost to the graphics, making the world look spectacular, while others give you a small boost with minor detail improvements. Getting a mod with better graphics might sound nice, but not everyone can use them. Mods, even in Minecraft, can take a lot out of your computer, especially with resource-intensive graphic mods.
The Kuda Shaders Mod gives you control and options, though. You can change your settings to your liking without having to worry about how it will affect your computer. It makes it easier to play and enjoy your world.

A Boost in Graphics
The goal of the Kuda Shaders Mod is to boost the graphics in Minecraft. It does this, like many other graphic mods out there. The difference is that it is neither high-end nor low-end. When searching for graphic mods, you will see them split between the two choices. With high-end, you have to have a good computer that can run the game with the mod installed. With low-end, you might not see a big improvement in your world. This mod is for people who want a good middle ground, offering more options.
Better for the Computer
People have fallen in love with the Kuda Shaders Mod because it is good on the computer. Not everyone can use the high-end mods due to hardware requirements. If your hardware cannot handle the mod, you cannot run it. Using the controls in this mod, you can personalize it to your personal needs. Go to the highest quality graphics possible or keep it low-end, whatever you need. It works with you on your level.
Since the graphics remain adjustable, you can keep the mod if you upgrade or update your computer. There is no reason to worry about compatibility or usability.

Never Worry
Part of the compatibility and usability is what you can expect from the game. With most mods, there is the chance of something changing or updating, putting both compatibility and usability at risk. That will not happen with this mod. Continue to use it without any restrictions or changes. It will work with your computer throughout the entire time that you use it.
Anyone who wants to improve their Minecraft game should look into the Kuda Shaders Mod 1.11.2 Attractive and accessible to all, it gives you better graphics in a way that works for your computer.


Shaders Review:
KUDA Shaders Mod Installation:
- Download and run the latest version of
- Download and install .
- Download and install .
- Go to Start Menu > Type %appdata%/.minecraft/mods
- Download the mod.
- Extract file.
- Open Minecraft and go to “Options”.
- Click on Shaders and select “Open shaderpacks folder”.
- Drag KUDA Shaders Mod folder into that.
- Select KUDA Shaders Mod and select “Done”.
- Done and Enjoy the mod.
The KUDA Shaders mod is one of the most popular shader packs of all time for Minecraft 1.13.2 and 1.12.2. This is because it’s a well-made addition, with very few bugs and a high degree of compatibility when it comes to various other popular mods, like . KUDA Shaders only recently made it out of Beta and into a real, full release, just earlier this month around January 30, 2018. The main reason there are so few bugs and so much compatibility is that KUDA Shaders was in development for so long. Now that it’s finally finished, there shouldn’t be any glitches or errors to worry about anymore.


With the first fully stable release of KUDA Shaders, many people are finally giving this shader pack a try and testing it out for themselves. With cool special effects like volumetric fog that seems to move and breathe like it’s a living thing, as well as great looking default textures without needless motion blur and other strange, unwanted effects, KUDA Shaders delivers just the right balance of things players want and things they don’t want. That is, it’s full of great features everyone likes, and nothing that people hate. That doesn’t mean it’s a perfect shader pack though, even with all that time in development.


The bloom effect seems a little weird sometimes, with light flares happening in places where you wouldn’t normally expect them to happen, or being bolder or more pronounced than you would imagine. But this is a relatively little “bad” thing compared to the heap of good things that KUDA Shaders does for players. This shader pack requires more system resources than most because of just how much it does, so you shouldn’t even try to use it with integrated graphics. A good graphics card is pretty much a necessity if you want to use this shader mod.


Because it does so many things so well, KUDA Shaders comes highly recommended, not just by this author but also by most the players who have tried it before. It’s come a long way now since its beta days and many issues have been ironed out and removed, so what you’re left with is a highly functional shader pack that simply makes Minecraft look better. KUDA Shaders still suffers from some of the same issues that plague other shaders though, like environmental shadows that seem to wiggle and move while the player is moving, but these issues are not enough to make this mod look bad.
Minecraft Extreme Graphics Cinematic with KUDA Shaders
- This shaders pack requires or to be installed!
Changelogs:
v6.5.26 for Minecraft 1.12.2 and 1.11.2
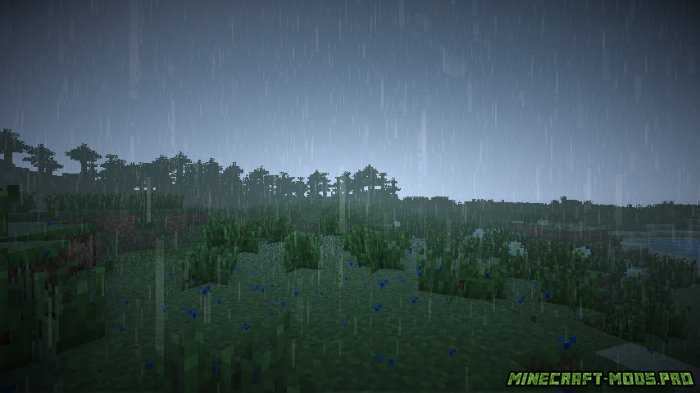
- Higher cloud opacity
- Removed “nPuddles” which probably caused issues with rain puddles
- YCoCg compression can be disabled due armor glint issues (I did this because I saw Gronkh’s livestream x))
- Water is also affected by windSpeed
- Fixed water animation suddenly stops
- Other minor fixes
v6.80 for Minecraft 1.10.2 and 1.9.4
- Fixed issues with translucent blocks on NVIDIA cards
- Improved dynamic weather
- Added an extra menu for dynamic weather for more controls
- Removed reflections and refraction for the Nether portal
- Better material detection of the hand in first person view
- Fog blur can be disabled
How to install KUDA Shaders Pack?
- The first step is to download and install the or on your Minecraft client (please install only one mod, don’t install both )!
- Now go to:
- Windows => %appdata%\.minecraft
- Mac OS X => ~/Library/Application Support/minecraft
- Linux => ~/.minecraft
- Search for the “shaderpacks” folder.
- Move the downloaded .zip into the shaderpacks folder.
- Now you can select shader in-game from Options/Shaders!
- That was all!
Download Links for KUDA Shaders Pack
for Minecraft 1.13.2, 1.13, 1.12.2, 1.11.2, 1.10.2 – Continued version
- KUDA-Shaders v6.1 Legacy (Update on 30.01.2018)
for Minecraft 1.13.2, 1.13, 1.12.2, 1.11.2, 1.10.2, 1.9.4, 1.8.9 & 1.7.10 – Old version
- KUDA-Shaders v6.5.56 (Update on 21.05.2017)
Credit: DeDelner – Do not forget to check official thread for more information!
» »